 I made a simple laser power meter. The results are pretty good. I measured my own Uniphase helium-neon laser, the results show the laser power is around 0.68 to 0.70 mW. The value is consistent with the measured results from Coherent LaserCheck. The laser power meter consists of three parts: the photodiode, termination board, and circuit board. Here is the photo of this laser power meter.
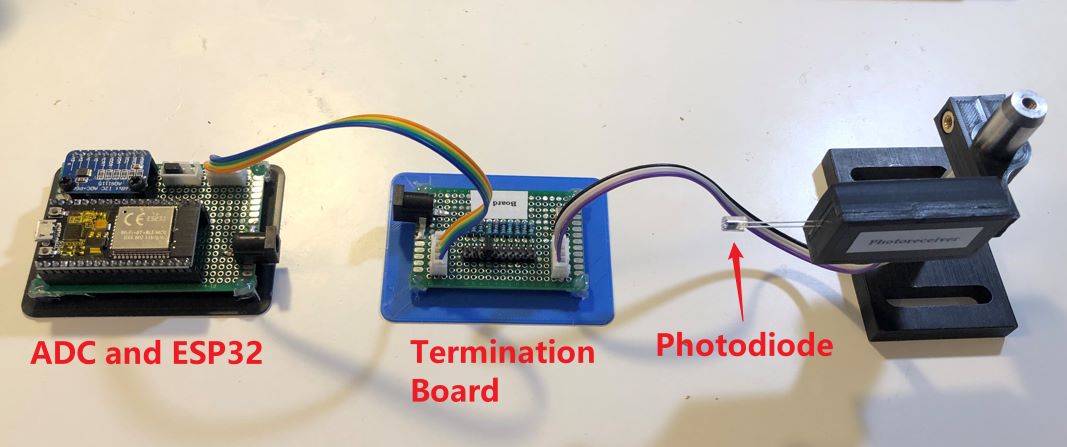
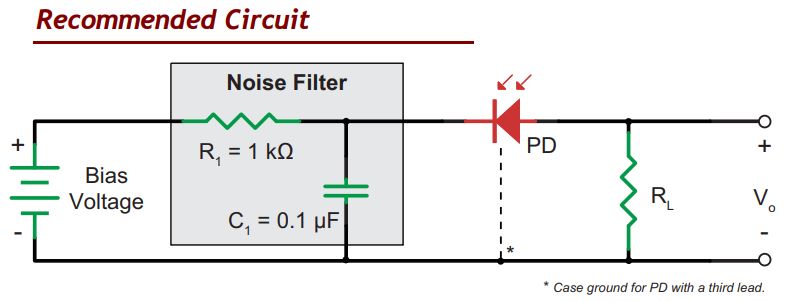
The photodiode is SFH 206 K obtained from Newark. The photodiode is directly soldered on a small prototype PCB in the black box. I did not take a photo inside the black box before I used superglue to glue the box. The internal circuit is the recommended circuit from Thorlabs, as shown in the following figure. I use a 1k ohm resistor and 0.1 μF capacitor as the noise filter. The bias voltage and the termination resistor are wired out to the termination board.
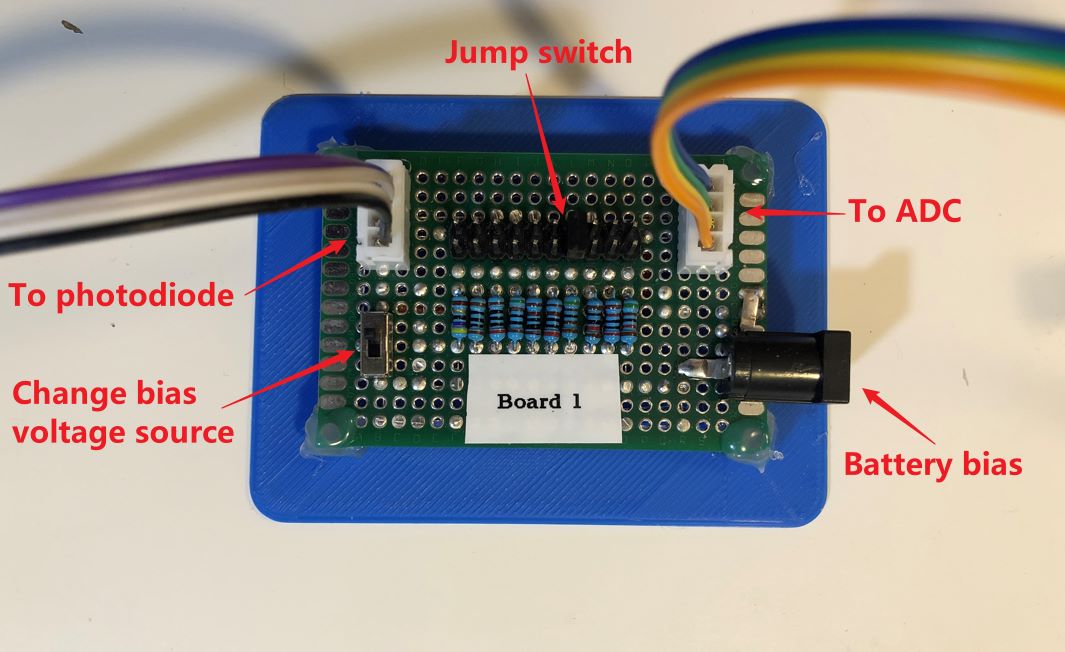
Here is the detail of the termination board. There are several termination resistors that can be selected based on the position of the jump switch. If the frequency response does not matter, a large termination resistor can be selected so that the transimpedance amplifier can be saved. I use 10 resistors ranging from 50 ohms to 50k ohms. A large resistor such as 50k ohms here may not be necessary. I also put a small slide switch here. Therefore, the bias voltage for the photodiode can be selected either from the battery or the ESP32.
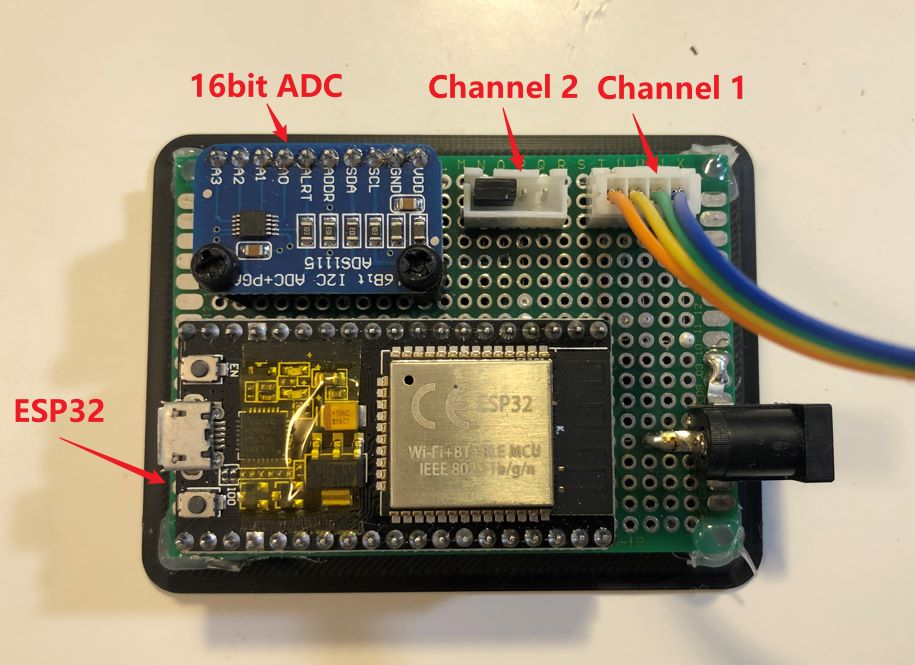
The signal is processed by a 16bit ADC (ADS1115) breakout board. ADS1115 communicates with ESP32 with the I2C protocol. The ESP32 is configured as an access point (AP) mode for the webserver. With AP mode, the router is not required here. I can directly connect to the Wi-Fi network sent by ESP32. ADS 1115 measures the voltage from the termination resistors and then the ESP32 calculates the laser power based on the measured voltage. The details will be given below.
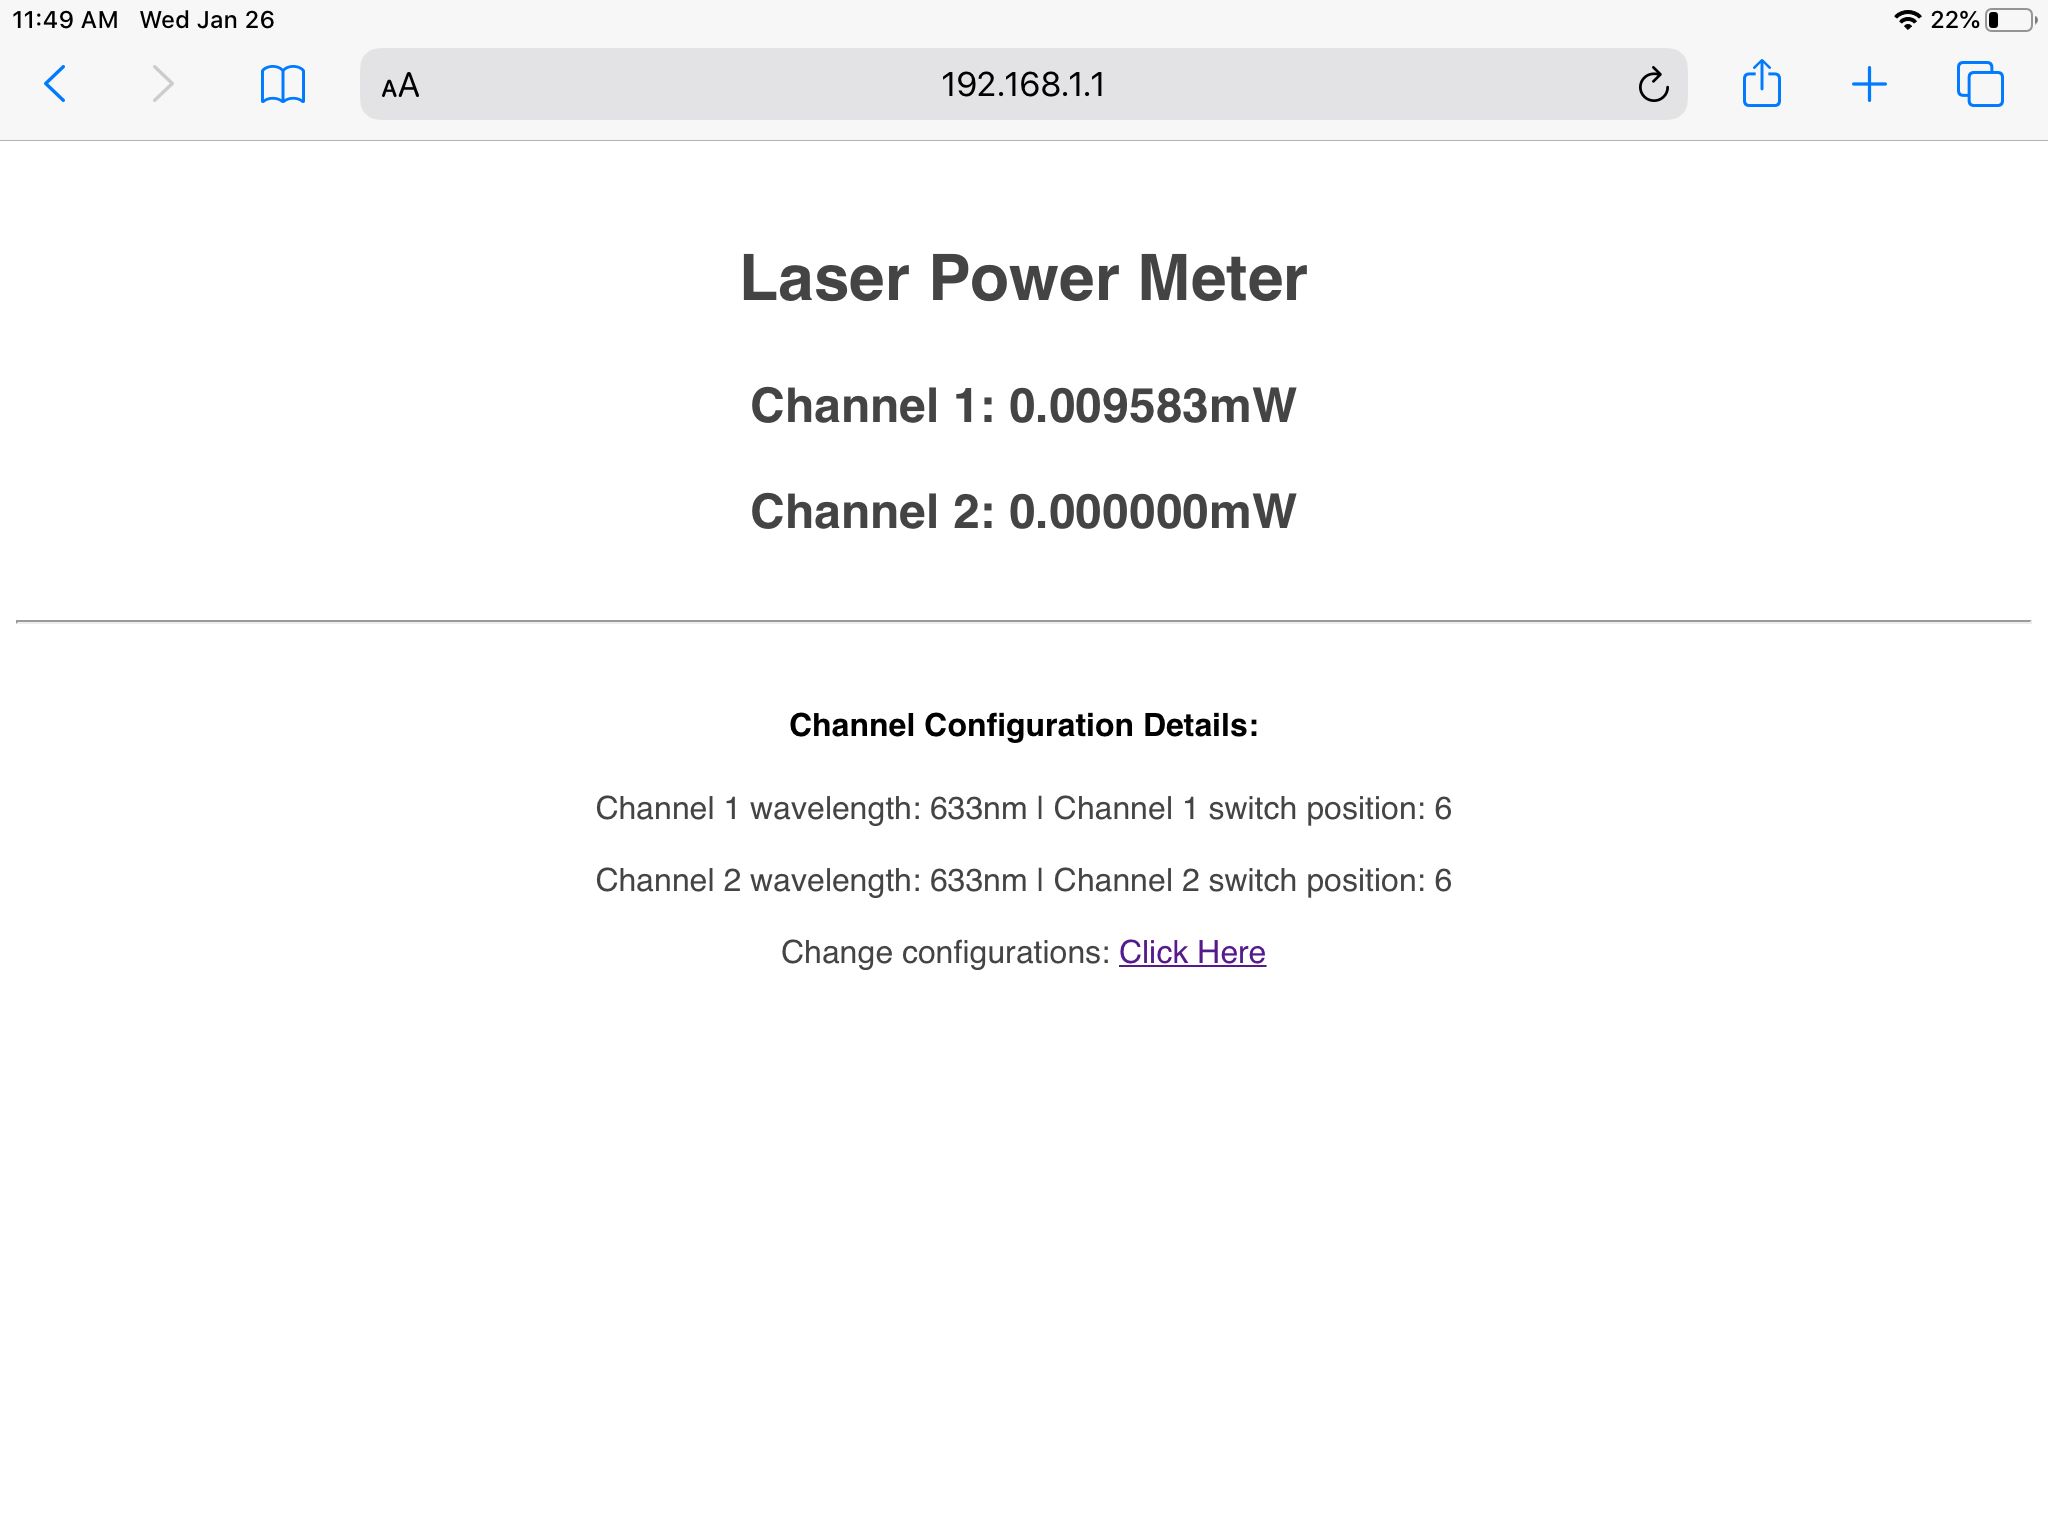
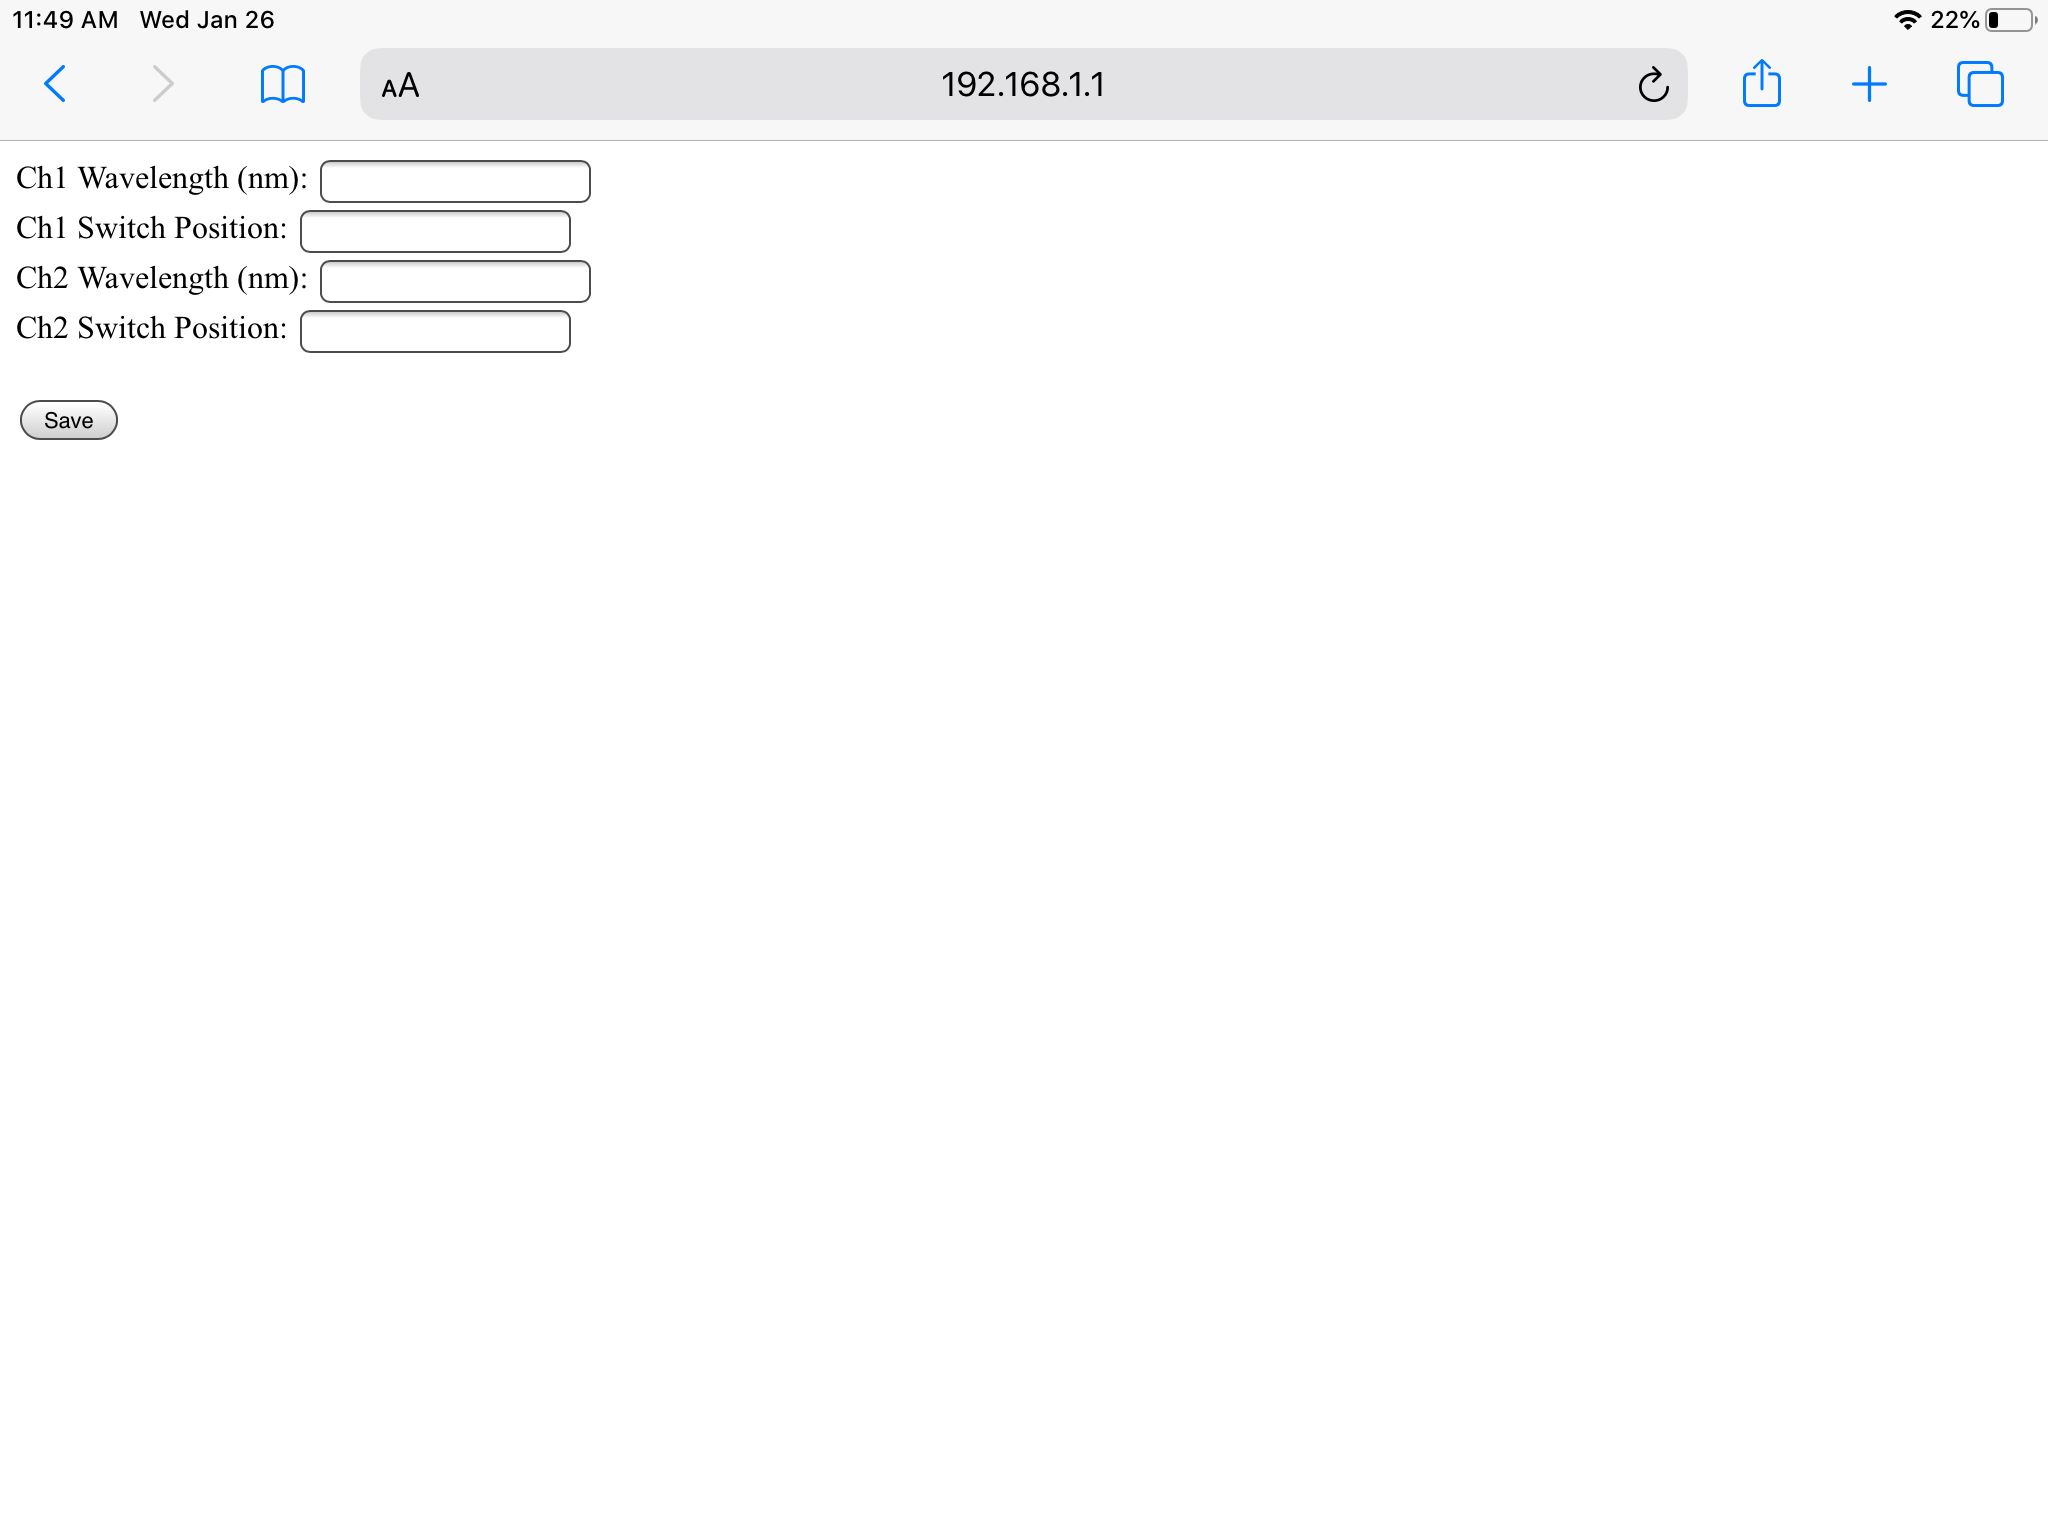
Here are the webserver screenshots. Since the AP mode does not connect to the real Internet, the web server just provides the essential information here. Channel 2 is shorted with a jump, so the reading is zero here. Channel 1 reading is the measure of the ambient light. The channel configuration details are also provided. It can be seen that both channels are configured to measure the laser with a 633 nm wavelength. The configuration details can be changed on another page, as shown below. The change value will be saved in ESP 32 SPIFFS. So, the ESP 32 can store the values even after the restart.
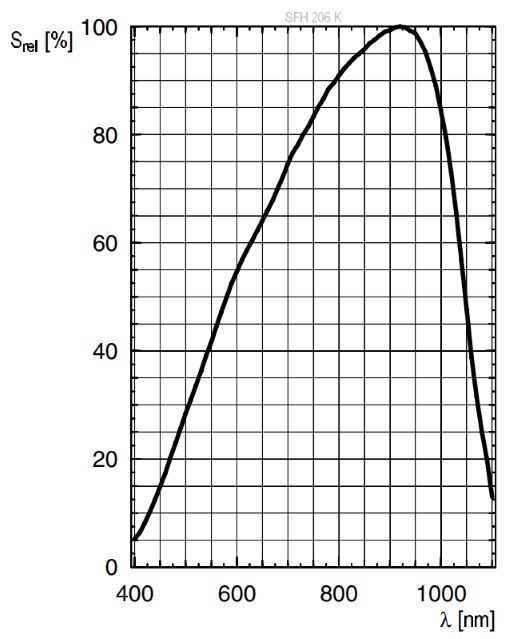
The following section describes the calibration details. The photodiode calibration is based on the datasheet of SFH 206 K. The datasheet shows that the spectral sensitivity of the photodiode at 850 nm is 0.62 A/W. Also, the datasheet provides the relative spectral sensitivity curve, as shown below. Therefore, the sensitivity for each wavelength can be calculated.
I extract the data from the relative sensitivity curve and obtain the specific value at each wavelength.
- Relative spectral sensitivity extract from the datasheet: Download
- Power sensitivity with interpolation at each wavelength: Download
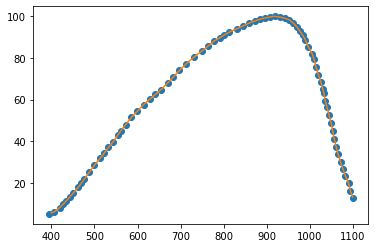
Therefore, with the value of termination resistors and the measured voltage from ADS 1115, the laser power can be calculated based on the above curve.