 When working with Ansys, there may be situations where the available materials or element models are insufficient for our needs, Then, we need to do custom development. However, setting up the environment for custom development is the first challenge in the development process. It is recommended to configure the Ansys UPF development environment on a newly installed system. My personal experience was that after configuring the environments for ABAQUS and MARC on my computer, attempting to set up the Ansys development environment led to numerous strange behaviors and difficult-to-resolve LINK errors. Fortunately, after reinstalling my computer and removing ABAQUS and MARC, I decided to configure the Ansys development environment.
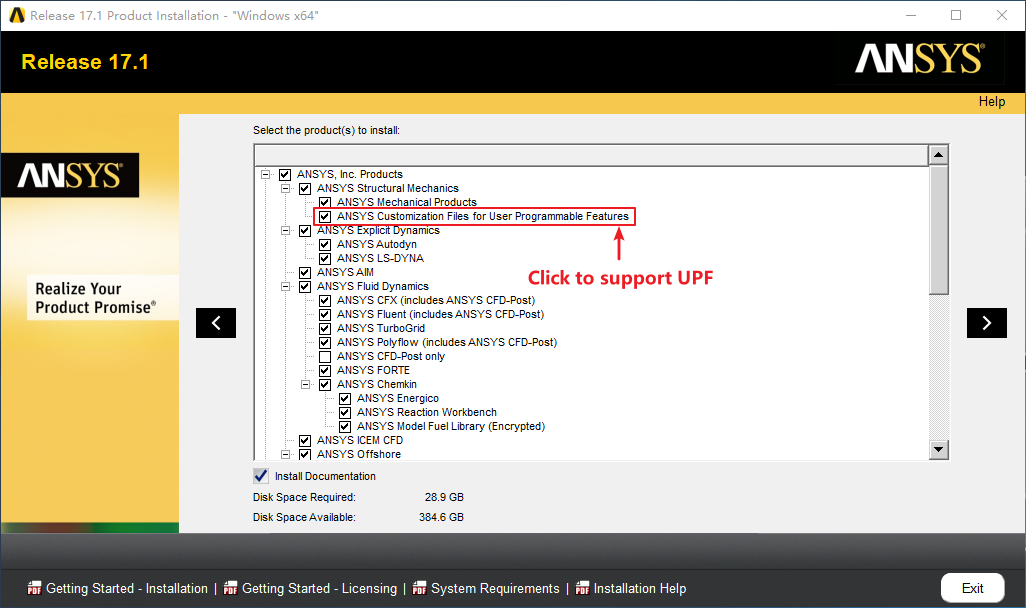
The environment I aimed to configure includes Windows 10 64-bit, Ansys 17.1, Visual Studio 2012, and Intel Fortran 2013. Ensure these software packages are downloaded and available. First, follow the existing Ansys installation tutorial, we need to make sure to select the options shown in the provided figure during the installation process,
After Ansys installation, we should install Visual Studio 2012, followed by Intel Fortran 2013. It is crucial to install Visual Studio first, as Intel Fortran will automatically detect and install the necessary plugins for the already-installed Visual Studio. Note: My Visual Studio 2012 is installed on the D drive, but Intel Fortran 2013 must be installed on the C drive, based on previous experiences with configuring the MARC development environment.
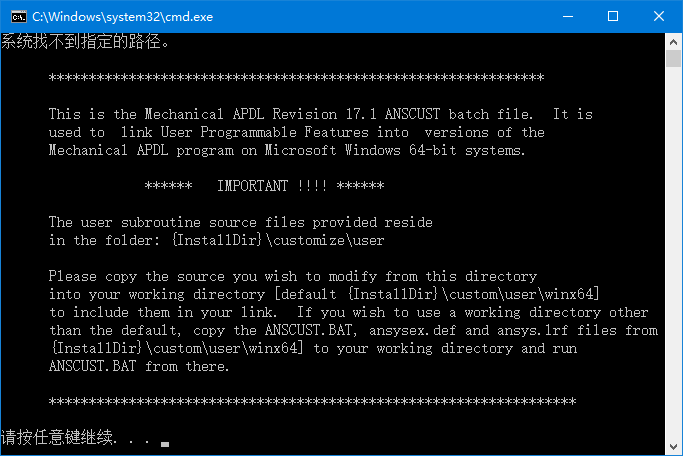
Once installations are complete, navigate to the Ansys installation directory (D:\Program Files\ANSYS Inc\v171\ansys\custom\user\winx64), and double-click the ANSCUST.BAT file to run it,
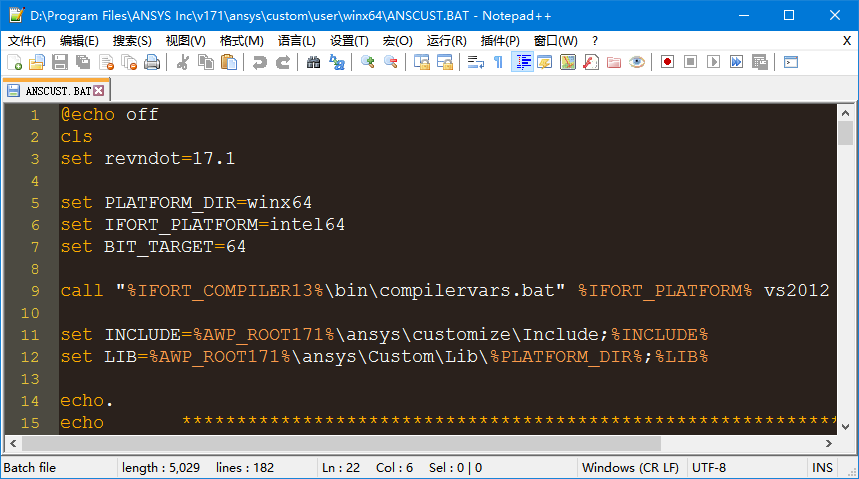
we’ll need to right-click and edit ANSCUST.BAT, changing the ninth line from %IFORT_COMPILER15% to %IFORT_COMPILER13%, as Ansys 17.1 defaults to supporting Intel Fortran 2015, but we’re using Intel Fortran 2013 for compatibility reasons (I need to install MARC later),
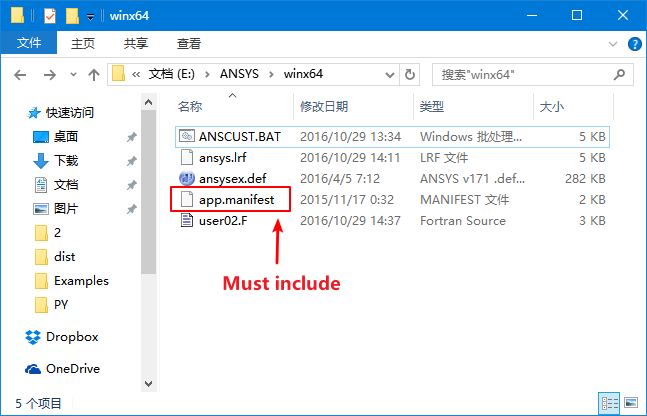
After saving the changes, copy ANSCUST.BAT, ansysex.def, ansys.lrf in D:\Program Files\ANSYS Inc\v171\ansys\custom\user\winx64, and user02.F in D:\Program Files\ANSYS Inc\v171\ansys\customize\user to a separate folder. Double-click ANSCUST.BAT to compile directly,
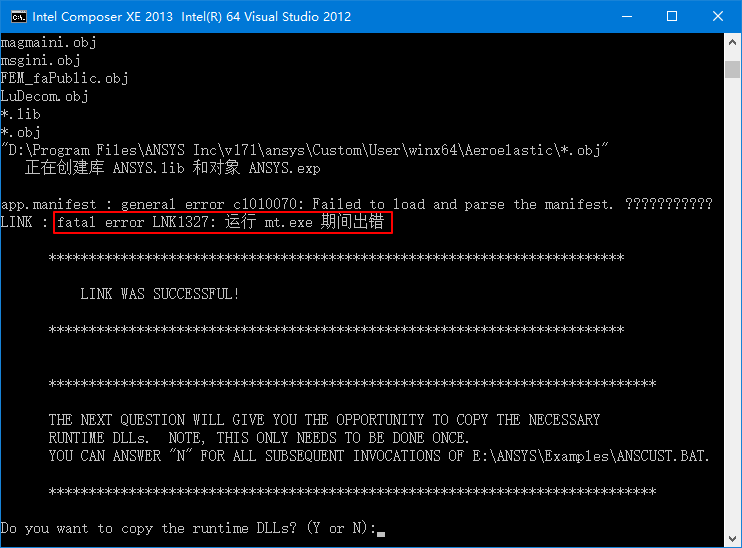
Now, we encounter a LINK: fatal error LNK1327 from mt.exe. Despite seeing “LINK WAS SUCCESSFUL!”, the absence of the ansys.exe file in the working directory indicates a failure. To resolve this, find app.manifest in D:\Program Files\ANSYS Inc\v171\ansys\custom\user\winx64 and copy it to the working directory,
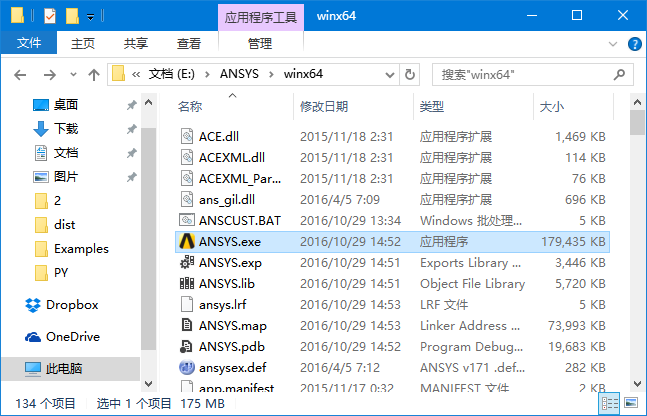
After this, double-clicking ANSCUST.BAT and proceeding with the prompts should allow for successful compilation. Ignore warnings about missing PDB files, as they contain debug information and don’t impact the program’s operation. Eventually, the ansys.exe file will appear in the installation directory,
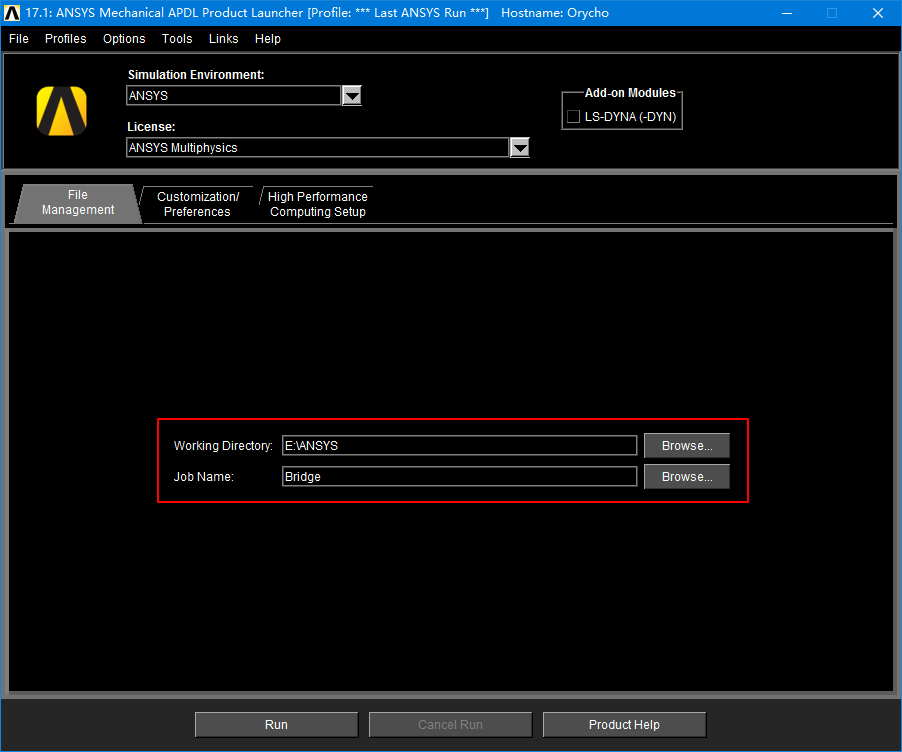
Open Ansys Mechanical APDL Product Launcher 17.1 and set the working directory,
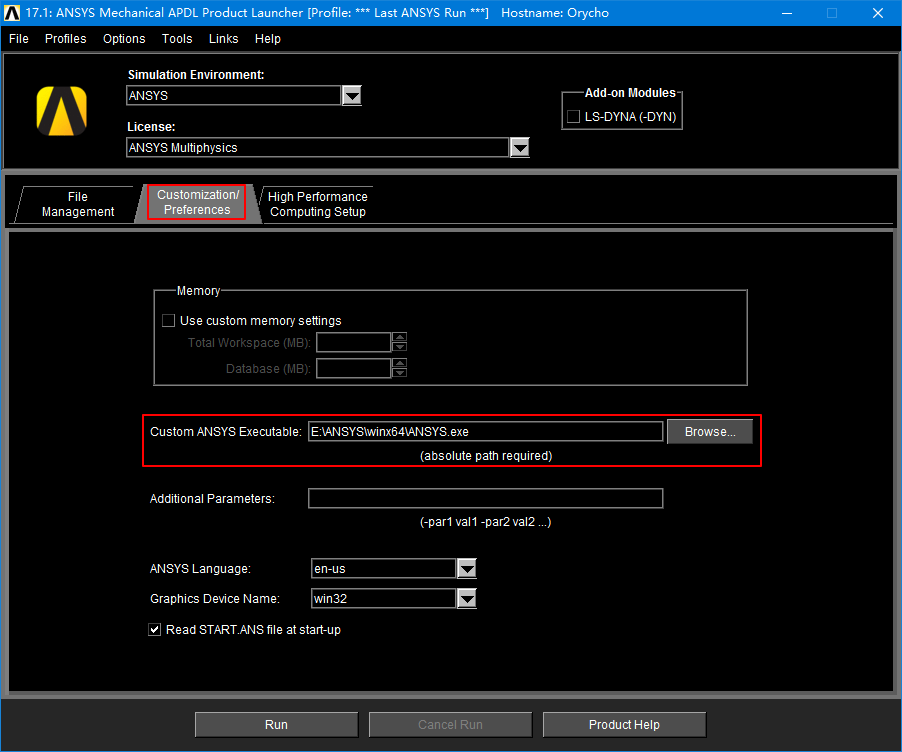
Go to the Customization Preferences tab and set the path to the newly compiled exe:
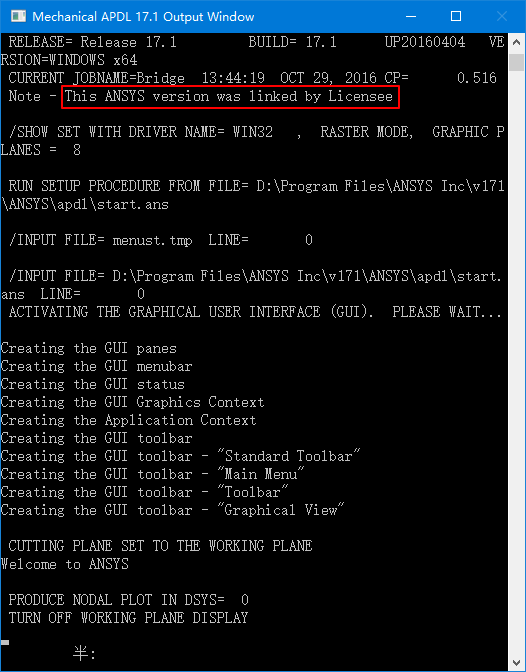
Click Run, and we should see “Note – This Ansys version was linked by Licensee” in the command window:
To test the subroutine, use the following command,
1 | |
This should open the following window,

Now, the ANSYS 17.1 UPF environment configuration is successfully completed.